The Battle of Hawley’s Toll Bridge

THE BATTLE OF HAWLEY’S TOLL BRIDGE

Tactical Problem #10,
Table Top Talk, March 1967

hawleys-toll-bridge

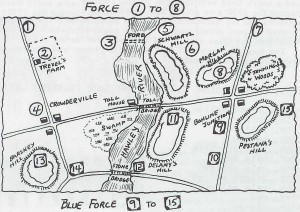
In this Tactical Problem, no troops may move across the River except at the bridges or the Ford. Infantry only may move 1/2 speed in Jenning’s Woods, and no one may move in the Swamp.

RED FORCE Is positioned as follows:

(1) 2 Line Infantry units
(2) 1 Unit Line and 1 cannon
(3) 1 Unit Heavy Cavalry
(4) 1 Unit Light Infantry in the village
(5) 1 Unit Guard Infantry
(6) 2 Line Infantry units and 1 cannon
(7) 2 Line Infantry units, 1 cannon and 1 Heavy Cavalry unit
(8) 1 Unit Light Cavalry and 1 horse gun

Orders:
Seize and secure Hawley’s Toll Bridge and drive off Blue Force from the area..

BLUE FORCE Is positioned as follows:

(9) 1 Unit Light Infantry
(10) 3 Line Infantry units and 1 cannon
(11) 1 Unit Line Infantry, 1 cannon and 1 Heavy Cavalry unit
(12) 1 Unit of Line Infantry
(13) 2 Line Infantry units and 1 cannon
(14) 1 Unit Guard Infantry, 1 cannon and  2 Heavy Cavalry units

Orders:
Seize and hold Hawley’s Toll Bridge and drive Red force from the area.

Around the Web

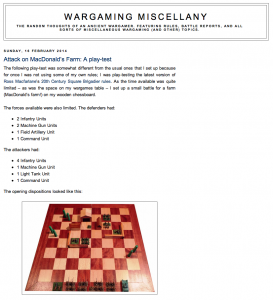
Today, I’d like to direct your attention to a post on Bob Cordery’s WARGAMING MISCELLANY site. On Sunday 16 February Bob posted a play test report: Attack on MacDonald’s Farm. The topic initially caught my attention for two reasons: 1) a gridded war game and 2) the rules were by Ross Macfarlane; his 20th Century Square Brigadier rules. A rules set that caught my eye just a little while back.

Wargame Miscellany


Bob’s blog is one that I read on a fairly regular basis. He often has many interesting ideas and stories to tell. If you have never visited his blog site, be sure to do so as I do believe that you too will find it to of interest.


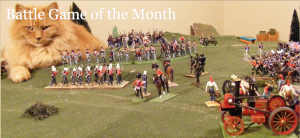
While out visiting you should also be sure to visit Ross Macfarlane’s Battle Game of the Month blog site.

Battle Game of the Month

I always finds the site to be informative and entertaining. I find much war game inspiration in the photos and write-ups on this site, and I think many of you will too. And besides, how can one resist a blog with such a cool header image?

Be sure to pay Bob and Ross a visit, you won’t be sorry.


1913: The Eve of War

Literary Muster – 1913: The Eve of War

1913: The Eve of War

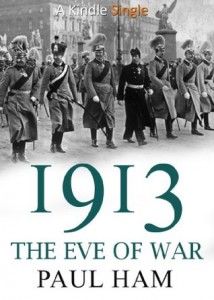
Was European / Global war in 1914 inevitable? This is the question author/historian Paul Ham addressees in this provocative, perhaps even controversial short (~83 pages) essay.

1913: The Eve of War is a  look at the state of Europe immediately prior the commencement of war in 1914. Little time is wasted and the essay gets straight to the point and gives understandable and believable reasons for why global war broke out in 1914.

I found this re-examination of the causes of the First World War to be both a short introduction to a complex historical subject as well as a, thought-provoking, contribution to the ongoing debate over the origins of this massive global conflict.

If you are looking for an in-depth study, this essay will not be your answer. If, however, you are looking for a good, short and thought provoking read this essay will fit the bill nicely.

Writing history is hard. In my opinion, Paul Ham has done an excellent job of writing history. He tires to write and observe from the point of those who lived through the time period without adding the distortions of the benefits (such as they are) of our hindsight and view of the past.

1913: The Eve of War – by Paul Ham
publisheD: 5 November 2013, Endeavour Press Ltd.
A $2.99 Kindle Single – 1,100KB, approximately 83 pages

Grand Duchy of Hesse-Darmstadt in the Napoleonic Wars

From 1966…

GRAND DUCHY OF HESSE-DARMSTADT IN THE NAPOLEONIC WARS

by David Rusk
Table Top Talk, 1966

 Hesse—Darmstadt troops served with the French from 1806-13, and then fought on the side of the Coalition against France. Until 1809, the army was a copy of the 1806 Prussian Army, but then it changed to the French system.

Organization

At first, there were three brigades, each with two line battalions and a fusilier (light) battalion. In 1809 the Erbprinz went to Spain, and converted its fusilier companies into two grenadier and two voltigeur companies, giving it a French six—company organization. The other two brigades kept their fusiliers until 1812, when the fusilier battalions were combined into a Garde Fusilier Regiment. This made three regiments, each with two battalions of four regular companies (the Garde Fusilier had four Fusilier companies per battalion).

Uniforms

The infantry wore dark blue coats and pants, white cross belts, brown knapsacks, dark blue coat rolls, and black shoes. The pants were usually worn over the gaiters. The Fusilier battalions of each brigade (until 1812) wore dark green uniforms with black cross belts.

All units wore black shakos with a silver shield and a white cockade with a red center. The shako had a double pompom with a red top and the bottom colored by company. Company colors were; first battalion, first company – white, second company – black, third company – blue, fourth company -red; second battalion, fifth company – yellow/white, sixth company – black/red, seventh company blue/white, and eight company red/white.

Facings

The Leibgarde Regiment had red plastron, collar, cuffs, turnbacks, and pants stripes. It also had dark blue cuff tabs, edge red, and dark blue epaulettes, without fringes and edged red also.

The Leibgarde plastron, worn for parade or full dress battle, had two rows of short white lace strips down each side (seven strips per row) and seven white buttons down the middle. The cuff tabs had three laces and three buttons. The attached Fusilier battalion, until 1812, had the same facings on its dark green uniform.

 The Leib Regiment used medium blue facings with the same uniform.

The Erbprinz Regiment had yellow facings. It also wore medium brown pants. Grenadiers had red plumes, cords and epaulettes. Voltigeurs had green cords, plumes tipped yellow, and green epaulettes with yellow half-moons.

The Garde Fusilier Regiment was the same as the Leibgarde, but with scarlet facings.

Cavalry

The Guard Chevauleger Regiment wore a dark green uniform. It had a red collar with black side patches, black cuffs and plastron. Six short white lace strips were on each side of the plastron, with a white button toward the outside edge of each strip. Three V—shaped laces with a white button in the center, reaching from wrist to elbow, were on the coat sleeves. The red shoulder boards were trimmed white, while the pants had red stripes. The waistbelt was white, while the shoulder belt was black and worn over the left shoulder. Boots, helmet with short crest and plume, were all black. Sabraque was dark green, trimmed with a black-white-black edge.

For Scruby Miniatures in 30mm see figure listing on the HistoriFigs website.
Lionel Tarr on Generalship in Modern War Games

A little something to fit in with the theme of last week’s Rules for Modern War Games post…

War Game Generalship

Attack and Defense in
Modern War Games

by Lionel A. Tarr
War Game Digest, September 1957

Two questions face the attacker in modern war games. 1) When to make the attack, and 2) How to attack. The question of “when” depends upon the course of the game and the action of the opponent. Any good war game general will soon develop a sixth sense (not always right!) when he believes it is time for the attack. Then the question is “how” to arrange his forces for the attack. And here, in modern war games at least, we may be of some help.

Single tank action, supporting attacking infantry, will invariably fail against an enemy commanding anti-tank weapons. To successfully use tanks a commander must amass enough weight to punch a whole squadron through, and beyond the enemy lines. This may take up to 2 or 3 squadrons of armoured fighting vehicles to do the job.

The method is to mass your armour opposite your opponent’s weakest front (if known). Then erupt in a mass, in an arrowhead with light tanks in the lead, and medium and heavy tanks on the flanks. The object is to drive straight through the enemy’s lines, with the light tanks that have survived carrying straight on ahead cutting the lines of communication and harassing the rear area.

The medium tanks consolidate the breach, mopping up any resistance, whilst the heavy tanks tern and roll up the flanks. Lorried infantry are now rushed into the breach and combining with flamethrowers, bombers (hand grenades) and rifles, supported by·rapid fire weapons (tommy gunners and machine gunners), follow the heavy tanks on their—mission.

A further company of infantry, with its own light support weapons, pushes forward in the wake of the light tanks, and these troops can be further supported by`a tactical wing of ground attack aircraft. p With all phases of the breakthrough attack working at once, your opponent will soon be reeling in confusion, groggy from the powerful thrust you have a him.

There is a defense for this type of attack and it hinges on a defense in depth. Give all defensive positions a good light anti-aircraft cover sited in positions where attacking planes can be engaged by two or more batteries simultaneously. Anti-tank guns should be set up likewise, preferably behind the front lines, and where two can fire simultaneously on the same area. Allow the initial tank thrust to penetrate without engaging except with flanking guns if possible. Then as soon as they break through your lines, pinch them·off from the infantry that follow (interdiction). Your anti-tank positions should be able to cope with the light tanks that break through, and the other tanks unless quickly supported by infantry, will run foul of your bazooka’s and other anti-tank weapons. The lorried infantry are quite vulnerable to mortar attack and machine gun fire, and only when in armoured half-tracks is it necessary to engage them with heavier weapons.

This modern war game depends a great deal on the Concealment Rule, which I use as follows: Troops moving at night, or out of observation during day moves, can be moved upon the map only, and not placed upon the table. Only troops observed, or under observation need be placed upon the table. If full advantage of this rule can be taken, the attacker can gather his forces together for the big push. The attacker must then gamble on certain features of the terrain being lightly held, or (if troops are in the open) that enemy air patrols don’t observe his massing for the attack.

The defender, in turn, must take a gamble at laying out his defenses, while both attacker and defender must hold themselves in readiness to swing over to the role of the opposition, i.e. the attacker to the defense, and vice versa.